/*Read DS18B20 Temp sensor for plant signal datalogging
* Dincer Hepguler 2013
* http://borsaci06.com
* DS18B20 code from: sheepdogguides.com/arduino/ar3ne1tt.htm
* Code lightly adapted from code from nuelectronics.com
*/
#include <SD.h>
// Pin definitions - attaches a variable to a pin.
// On the Ethernet Shield, CS is pin 4. Note that even if it's not
// used as the CS pin, the hardware CS pin (10 on most Arduino boards,
// 53 on the Mega) must be left as an output or the SD library
// functions will not work.
const int chipSelect = 10;
const int LeafSensor = A2; // A2 pin is used to read the value of the
Leaf Sensor
int LeafState;
const int SoilSensor = A0; // A0 pin used to read val of soil sensor
int SoilState;
int NumReadings = 20; //number of readings per avarage
//float Deg;
#define TEMP_PIN 3 //D3 pin for ds18b20 signal line
void OneWireReset(int Pin);
void OneWireOutByte(int Pin, byte d);
byte OneWireInByte(int Pin);
void setup() {
digitalWrite(TEMP_PIN, LOW);
pinMode(TEMP_PIN, INPUT); //
sets the digital pin as input (logic 1)
pinMode(LeafSensor, INPUT); //defines A2 pin as input
pinMode(10, OUTPUT); //make sure the chip select
pin10 is set to output
Serial.begin(9600);
while (!Serial) {
; // wait for serial port to connect. Needed for
Leonardo only
}
Serial.print("Initializing SD card...");
// see if the card is present and can be initialized:
if (!SD.begin(chipSelect)) {
Serial.println("Card failed, or not present");
// don't do anything more:
return;
}
Serial.println("card initialized.");
delay(100);
Serial.print("Leaf: Soil: Temp:\n");
}
void loop(){
// make a string for assembling the data to log:
String dataString = "";
LeafState = analogRead(LeafSensor); // reads LeafSensor and
stores to LeafState variable
LeafState = map(LeafState, 0,1023,0,255);
dataString += String(LeafState);
dataString += "\t";
SoilState = ReadSensorAvg();
SoilState = map(SoilState, 0,1023,0,255);
dataString += String(SoilState);
dataString += "\t";
int HighByte, LowByte, TReading, SignBit, Tc_100, Whole, Fract;
OneWireReset(TEMP_PIN);
OneWireOutByte(TEMP_PIN, 0xcc);
OneWireOutByte(TEMP_PIN, 0x44); // perform temperature conversion,
strong pullup for one sec
OneWireReset(TEMP_PIN);
OneWireOutByte(TEMP_PIN, 0xcc);
OneWireOutByte(TEMP_PIN, 0xbe);
LowByte = OneWireInByte(TEMP_PIN);
HighByte = OneWireInByte(TEMP_PIN);
TReading = (HighByte << 8) + LowByte;
SignBit = TReading & 0x8000; // test most sig bit
if (SignBit) // negative
{
TReading = (TReading ^ 0xffff) + 1; // 2's comp
}
Tc_100 = (6 * TReading) + TReading / 4; // multiply
by (100 * 0.0625) or 6.25
Whole = Tc_100 / 100; // separate off the whole and
fractional portions
Fract = Tc_100 % 100;
//float Deg = Tc_100 * 0.01;
dataString += String(Whole);
dataString += ",";
dataString += String(Fract);
if (SignBit) // If its negative
{
Serial.print("-");
}
//LeafState = analogRead(LeafSensor); // reads LeafSensor
and stores to LeafState variable
//delay(1);
//Serial.print(Whole);
//Serial.print(".");
//if (Fract < 10)
//{
// Serial.print("0");
//}
//Serial.print("Temp:");
//Serial.print(Fract);
//Serial.print("\t");
//Serial.print(Deg);
//Serial.print("\t");
//Serial.print("LeafState:");
//Serial.print(LeafState);
//Serial.print("\n");
// open the file. note that only one file can be open at a time,
// so you have to close this one before opening another.
File dataFile = SD.open("datalog.txt", FILE_WRITE);
// if the file is available, write to it:
if (dataFile) {
dataFile.println(dataString);
dataFile.close();
// print to the serial port too:
Serial.println(dataString);
}
// if the file isn't open, pop up an error:
else {
Serial.println("error opening datalog.txt");
}
delay(1000); // 5 second datalog delay.
Adjust as necessary
}
void OneWireReset(int Pin) // reset. Should improve to act as a
presence pulse
{
digitalWrite(Pin, LOW);
pinMode(Pin, OUTPUT); // bring low for 500 us
delayMicroseconds(500);
pinMode(Pin, INPUT);
delayMicroseconds(500);
}
void OneWireOutByte(int Pin, byte d) // output byte d (least sig bit
first).
{
byte n;
for(n=8; n!=0; n--)
{
if ((d & 0x01) == 1) // test
least sig bit
{
digitalWrite(Pin, LOW);
pinMode(Pin, OUTPUT);
delayMicroseconds(5);
pinMode(Pin, INPUT);
delayMicroseconds(60);
}
else
{
digitalWrite(Pin, LOW);
pinMode(Pin, OUTPUT);
delayMicroseconds(60);
pinMode(Pin, INPUT);
}
d=d>>1; // now the next bit is in
the least sig bit position.
}
}
byte OneWireInByte(int Pin) // read byte, least sig byte first
{
byte d, n, b;
for (n=0; n<8; n++)
{
digitalWrite(Pin, LOW);
pinMode(Pin, OUTPUT);
delayMicroseconds(5);
pinMode(Pin, INPUT);
delayMicroseconds(5);
b = digitalRead(Pin);
delayMicroseconds(50);
d = (d >> 1) |
(b<<7); // shift d to right and insert b in most sig bit position
}
return(d);
}
int ReadSensorAvg(){ //subroutine for reading sensor n times and
avarage
int i=0;
int SoilState=0;
for (i=0; i < NumReadings; i++){
SoilState = SoilState + analogRead(SoilSensor);
//read sensor n times
delay(10); //delay
between reads for more stability
}
SoilState = SoilState / NumReadings;
//avarage
return SoilState;
}

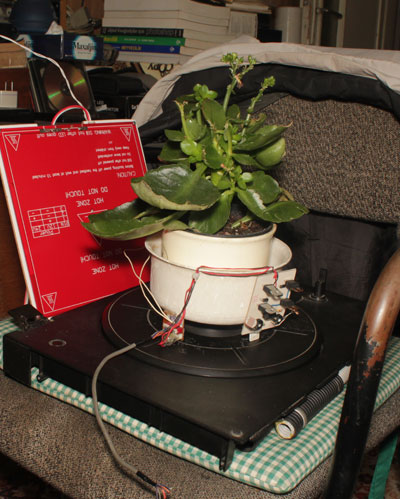
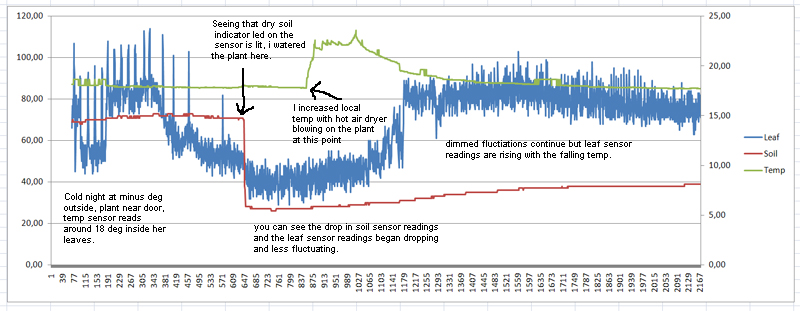
Wanted to share with you
part of tonight's datalogging results... its very cold outside here at
minus degrees and its snowing outside. my Hoya is near the terrace door
and a little cold surrounding... after few hrs of datalogging i saw that
green led on soil sensor is lit, indicating that the soil is dry... so i
watered the plant while datalogging and saw some changes in the log window.
then i tried to increase the
surrounding temp blowing with a hot air hair dryer for a while. then
stopped the torture on the plant and graphed the log file to post here...
you can see the part of the log below with some explanations...
Update
on 13.Dec.2013:
Still working on datalogging
and better plant response tracking... Trying to create a good interface
between the plant and the robot, i need a reliable and usable sensor setup
between them... actually the datalogging process taught me a lot in the
last few days but i have to improve sensor and data quality... As you can
see from the below datalog session that the plant is giving realtime
responses to environmental changes but the sensor data from the resistive
sensor attached to the plant leaf is not reliable... the relative plant
response can be read clearly but the data structure is not consistent
enough to be used in a software... The sensor displays a different scale
everytime its powered on, values decaying for a while to stabilize in the
end...

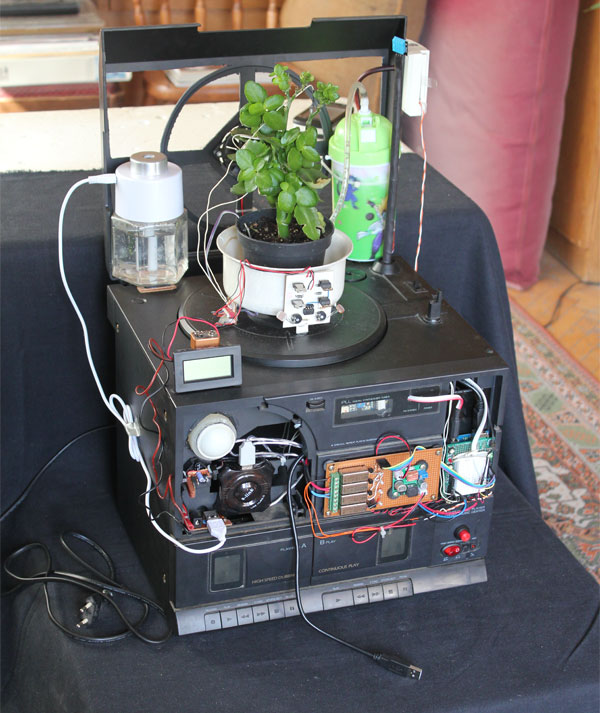
So I decided to carry on
with a new approach to improve data reliability... I know that plants are
good conductives and receptors as living tissue... In order to read in-plant
activity I made a different sensor reading in a new way... it is a simple
antenna signal meter consisting of a small coil, a Germanium diode and a
trimer, small enough to attach to the plant stem... So it now reads the
signals more reliable via the same Arduino analog port... will display my
results in the next few days...

Update on
20.Dec.2013 :
Sometimes the solutions come
from simplest approaches... One night when making some tests on MRL and
data sharing over the internet, Greg told me that a simple wire connected
to an Arduino port is the simplest sensor... I just removed all the
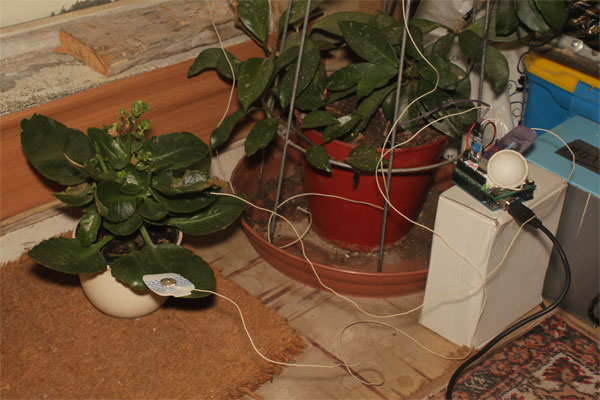
electronics from the plant and connected a simple wire to the stem with
the wounded coil seen on the above photo and saw that sensor readings were
good and stable, so I decided to use that as capacitive sensor... so now I
have a capacitive sensor on the stem and a galvanic response resistive sensor on
the leaf... I also changed the Dallas temp sensor with the DHT11 which I
had on hand... so I am now reading both environmental temperature and
humidity data flowing from the plant... I also disconnected the datalogger
and reading directly to PC with a terminal program and plot on Excel on realtime...
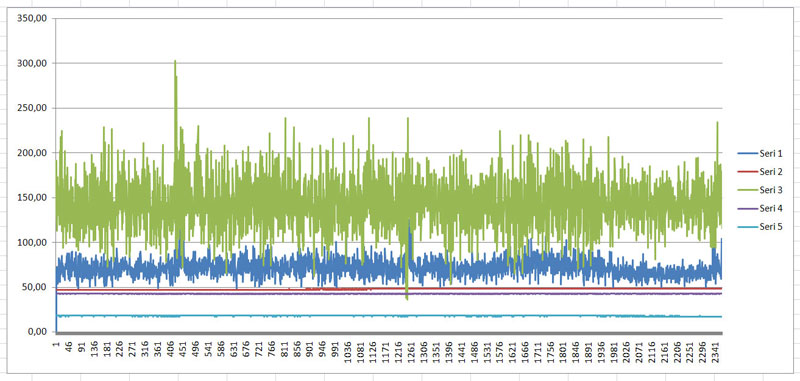
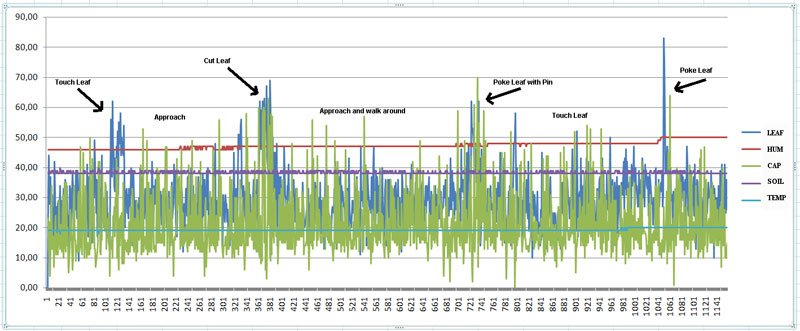
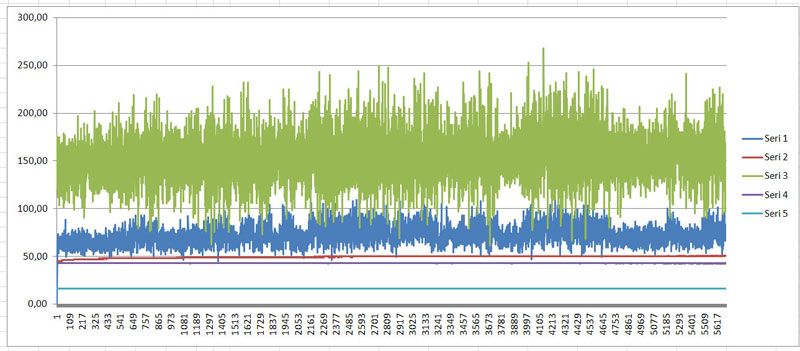
The sensor values vary with
environmental conditions such as temp, humidity and soil moisture, also
light and human activity around the plant... The peaks on the graph show
times when I approached the plant and touched her, closest the touch,
higher the sensor value peaks... The amplitude of the plant signal also
increases with stress and unfavorable conditions such as temp& moisture
changes... The amplitude of the signal dampens with more stable
conditions... A happy plant...
Of course the interface
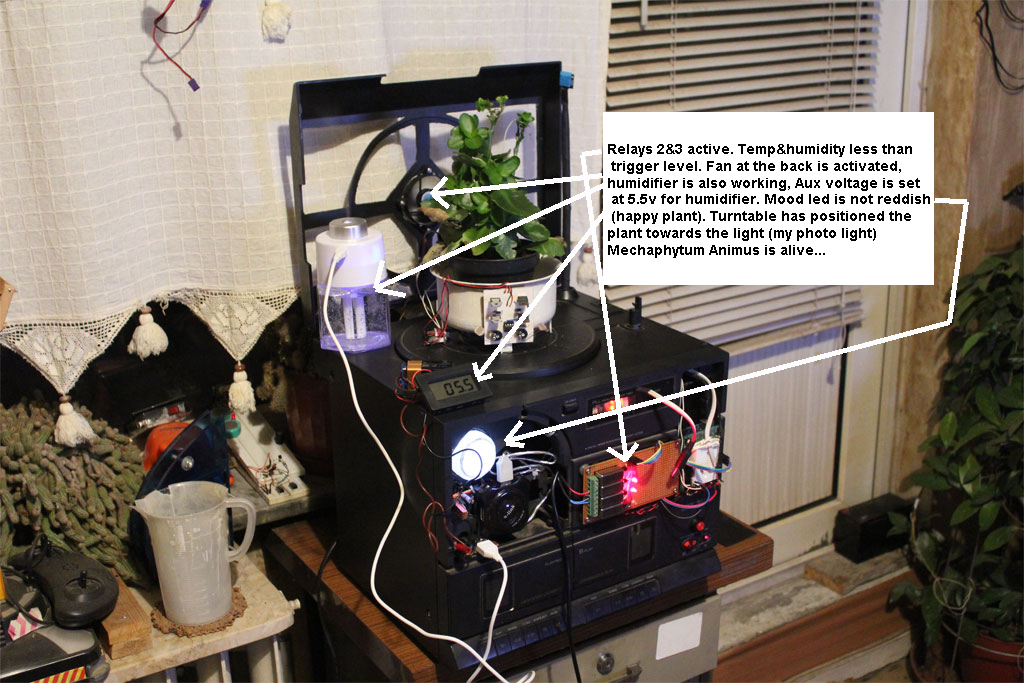
Arduino script has also been changed... New script also has a mood lamp which
I made with a
multi-legged rgb led which is showing the plant's health state with color...
the color is changing by the sensor values, this way I can have an idea
about the plant's state with a glance to the lamp color... Redder means
plant is in distress and yellowish-green means a happy plant... This is
especially convenient when plantoid is not on usb connection and not plotting data on PC...




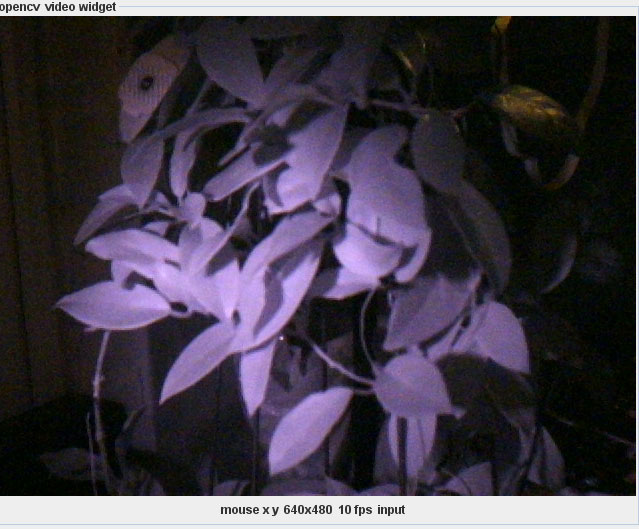
 NIRcam with IR leds

